Chapter 5: Desolation It Wrought
Last verified: September 2, 2026
Desolation It Wrought is the second Trial and the game's densest puzzle chapter. It contains 37 current collectible locations: 1 Blade, 5 Artefacts, 5 Charms and 26 Resonance Points. The Pierced Coin is both a Charm and the chapter's one Theseus Echo classification, so it is included in the five-Charm total rather than counted twice.
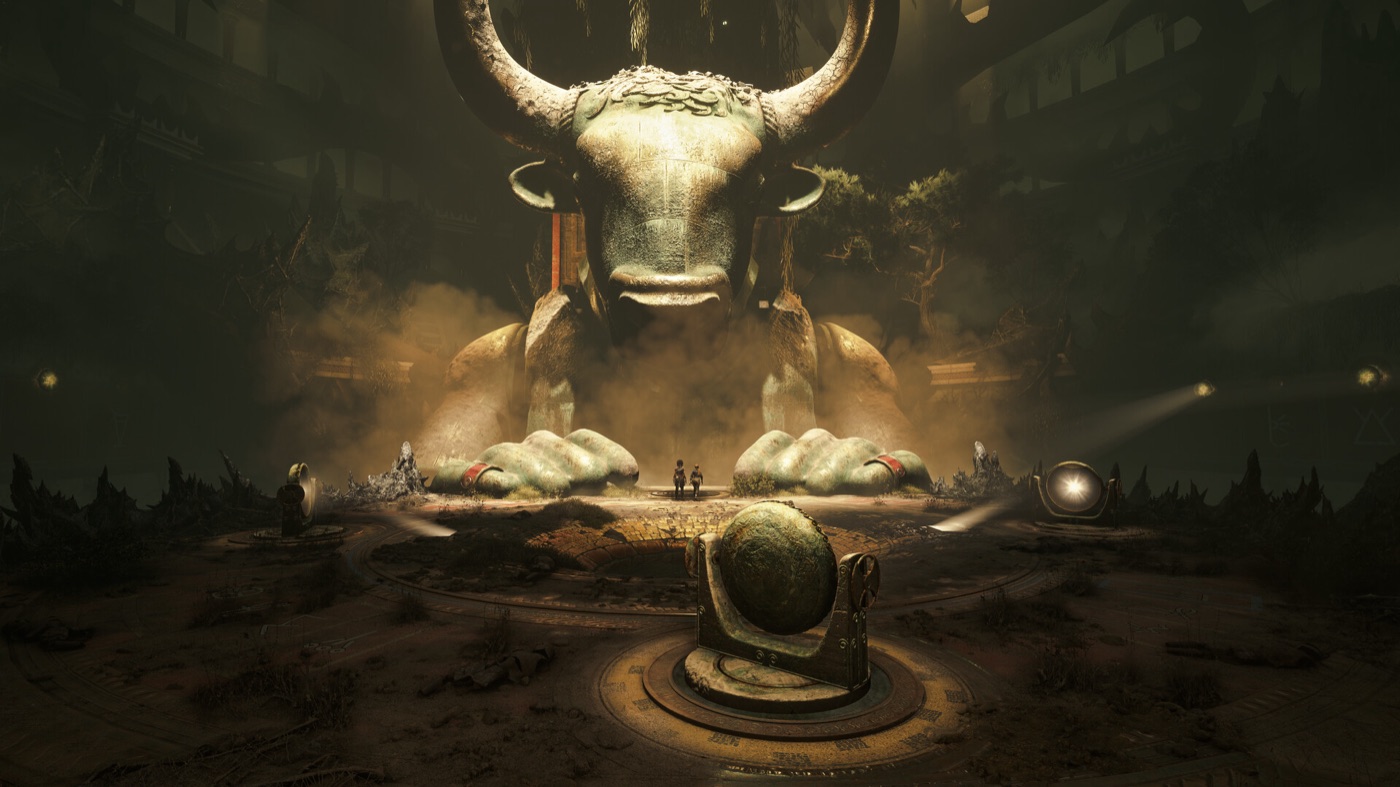
The second Trial links four symbols to a chain of light puzzles, traps and hidden tombs.
Chapter V at a Glance
Chapter V has four sections:
- Row as one: the Trial entrance and its first light-door puzzle.
- Battle grounds: the central temple approach, camps and the first three named items.
- The four symbols: four branches of traps, mirrors and statue-door trials.
- Live up to his name: the final symbol and the end of the chapter.
| Category | Current total | What to collect |
|---|---|---|
| Blade | 1 | Greek Sword, hidden in the optional bull-pillar crypt |
| Artefacts | 5 | Griffin Figurine, Dante's Inferno — Canto XII, Scarab Amulet, Ceremonial Blade and Condottiero Stamp |
| Charms | 5 | Trinket #2, Seals #2, Bracelet #3, Armband #3 and Pierced Coin #1 |
| Theseus Echoes | 1 classification | Pierced Coin #1, already included in the five Charms |
| Resonance Points | 26 | 22 route groups, including the groups that award 2 points |
The route below follows the current 26-point total. Older launch routes can show 29 because they include two flower-platform pickups that no longer appear on the current route and carry an early quantity label that was later corrected. If a flower platform is empty, do not keep replaying it — continue with the point groups listed here.
Resonance Points do not carry over through Chapter Select. Sweep them during the current run and reach checkpoints after each area. The named Blade, Artefacts and Charms can be cleaned up later through chapter replay.
Open the Second Trial
Section: Row as one · Objective: Explore the Trial's entrance.
Before entering the first room, turn around and check the approach. Then use the central pedestal and the Sphere to align the three coloured lights with the gems on the door. The first room teaches the light controls used by the rest of the chapter.
Resonance Point 1 — Before the first room
The first point is outside the entrance, before you go into the initial room. Pick it up before interacting with the central pedestal.
Door puzzle pointer: interact with the pedestal in the middle of the room, stand on the right-hand floor pad to activate the Sphere, and rotate the coloured lights until they meet the matching gems on the door. Once the door opens, continue into Battle grounds.
Battle Grounds Sweep
Section: Battle grounds · Objective: Reach the central temple.
After the entrance puzzle, Sophia is returned outside. The route to the central temple looks linear, but the camps and ruined houses contain several side pickups. Clear the area before going through the large green gate.
Resonance Point 2 — Outside the entrance
After the entrance cutscene, turn left. The point is beside the door you have just come through.
Resonance Point 3 — Right of the stairs
Use the zipline and follow the stairs toward the enemies. Before dropping down to them, check the right side of the stairs for the point.
Resonance Point 4 — House after the fence
Defeat the next group and pull down the fence. Go through it, then enter the house on the right to find the point inside.
Trinket #2 — Charm
After the house, step out by the pond and look for the small camp. Climb to the higher tent on the cliff and open the crate for the Trinket #2 Charm.
Resonance Points 5–6 — Camp combat reward
Opening the Trinket chest starts a fight. Defeat the enemies to receive 2 Resonance Points automatically.
Resonance Point 7 — Straight after the fight
After the camp fight, continue straight instead of going directly to the next gate. The point is on the route ahead.
Seals #2 — Charm
From the last point, climb to the ledge with the building. Go inside and open the crate for the Seals #2 Charm.
Griffin Figurine — Artefact
Leave the Seals building and take the right side toward the next enemy group. After the fight, enter the ruins on the left where the floor has spike traps. Shimmy across the wooden boards in the corner to reach the Griffin Figurine.
Resonance Point 8 — Beneath the lonely tree
From the Griffin Figurine, return across the boards and go straight to the stone stairs leading back toward the beach. Search beneath the lone tree above the boats for the point.
Resonance Point 9 — Ruined house by the stairs
Turn around from the tree and check the ruined house to the left of the stone stairs. The point is inside.
Dante's Inferno — Canto XII — Artefact
Continue down the ladder into the enemy camp. After clearing the camp, look between the two white tents at the back for Dante's Inferno — Canto XII.
Return to the large green gate in the central area and interact with Leni. The central receptacle opens four sockets, each marked by a symbol above its door. Sweep the side branches before committing to the next trial.
Four Symbols
Section: The four symbols · Objective: Find the four symbols.
The central room has four routes. The names below describe the visible marks: a hammer/axe symbol, a square or dice-like symbol, a circle with three lines and a circle over a line. The exact order is flexible, but the collectible route is easiest if you clear each branch before returning to the sockets.
Resonance Point 10 — Hammer/axe door
After activating the four sockets, go under the door marked with the hammer/axe symbol. The point is on the short dead-end path before the trial proper.
Bracelet #3 — Charm
Take the door marked by the square/dice-like symbol. After Sophia is separated from Leni, jump down the platforms and look for the collapsed tower. Do not continue forward: turn around and climb the tower behind you to reach the chest with Bracelet #3.
Resonance Point 11 — Back on Leni's side
After reuniting with Leni, turn back toward the side she came from. Check the first tower on the left for the point.
Resonance Points 12–13 — After the upper fight
Continue through the gap and climb upstairs. Defeat the enemies there to receive 2 Resonance Points automatically.
Resonance Points 14–15 — Square-platform route
Use the safe floor-symbol route across the spike platforms to collect 2 Resonance Points before taking the symbol. These are the current points on this branch; an older flower-platform route can be empty.
Scarab Amulet — Artefact
In the same square-platform trial, use the safe floor symbols to cross the spikes and reach the back-left side of the platform route. The Scarab Amulet is beyond the sequence.
Floor-symbol pointer: the visible sequence is Dots → Squid/Kraken → Dots → Flower → Squid/Kraken. Use the symbol marks rather than jumping blindly; a wrong platform drops Sophia into the spikes. After the Scarab route, jump off the squares to reset the path if you need to return to the central room.
Resonance Point 16 — Before the next symbol
After the square-platform traps and before collecting the symbol, turn left. The point is in the side area.
Armband #3 — Charm
Use the zipline and defeat the guards on the beach. Search the crate on the beach for the Armband #3 Charm.
Resonance Point 17 — Pond on the three-line route
Enter the route marked by the circle with three lines and keep left. A small pond appears along the left path; the point is beside it.
Optional Blade Route
Before entering the bull gate, turn back and clear the three connected branches. The secret Blade requires a light alignment, while the two remaining Artefacts are on the paths around it. Do this sweep before advancing through the next symbol door.
Pierced Coin #1 — Charm and Theseus Echo
Stay left past the pond and climb the ladder. Defeat the enemies at the top, then interact with the green axe and the bowl in front of it to collect Pierced Coin #1. This is a Charm and the chapter's one Theseus Echo classification.
Resonance Point 18 — Bird nest branch
Turn back toward the bull gate and take the first branch up the rocks onto the broken ruins. Scare the birds away from the nest to reveal the point. While you are there, use the Sphere on the coloured gems to open the secret door below.
Resonance Point 19 — Green gem branch
Take the next branch toward the tower with the skull. The point is beside the green gem on the way in.
Greek Sword — Blade
Use the light alignment at the bull pillar to open the axe-marked secret floor. Enter the tomb and open the large chest for the Greek Sword, the chapter's Blade and the second sword from a Hero's Grave.
Ceremonial Blade — Artefact
Continue along the branch with the green gem and take the small path to the right when it descends. The Ceremonial Blade is at the bottom of the tree there.
Condottiero Stamp — Artefact
Clear the third branch by descending its staircase. Follow it to the end to find the Condottiero Stamp.
Return Toward the Bull Door
After the optional branches, return to the bull door and continue through the remaining symbol routes. The following points are on the connecting path toward the statue trials.
Resonance Point 20 — Bull-door barrel
On the way back to the bull door, look near the barrel for the point.
Resonance Point 21 — Room with the central light
Enter the next room with a light in the middle. The point is on the left side.
Resonance Point 22 — End of the zipline
After collecting a symbol, ride the zipline. At the far end, check beside the rock for the point.
Resonance Points 23–24 — Rocks beside the bridge
Take the gate marked by the circle over a line and cross the bridge. Two points sit beside the rocks on the right.
Resonance Point 25 — Right after the Grapnel climb
Use the Grapnel to climb the next side and turn right at the top. The point is tucked into the ledge.
Resonance Point 26 — Next room
Enter the following room and check the right side for the final point group on the approach to the last symbol trial.
Statue-door pointer: each branch asks you to stand on a lit floor plate, align the Sphere's coloured beams with the matching statue gems, then cross the spike section. Use the raised mirrors and the blue safe-path line when a trial changes from beam alignment to traversal. The puzzle solutions guide has the chapter's light-puzzle controls in one place.
Finish the Chapter
Section: Live up to his name.
Once the four symbols are installed, follow the opened route through the final statue sequence and Theseus memory. This last section contains no additional named pickup; the last Resonance Point is the group on the approach above. Complete the scene to finish Chapter V and move into Chapter VI.
Complete Chapter V Checklist
The named-item count is 11: 1 Blade, 5 Artefacts and 5 Charms. The current route adds 26 Resonance Points across 22 groups, for 37 physical collectible locations in total.
Named Items
| Done | Type | Item | Location |
|---|---|---|---|
| ☐ | Charm | Trinket #2 | Upper tent in the small camp beside the pond |
| ☐ | Charm | Seals #2 | Crate inside the building on the raised ledge |
| ☐ | Artefact | Griffin Figurine | Ruins with floor spikes, reached across wooden boards |
| ☐ | Artefact | Dante's Inferno — Canto XII | Between the two white tents in the lower enemy camp |
| ☐ | Charm | Bracelet #3 | Chest on the tower behind the collapsed tower in the square-symbol trial |
| ☐ | Artefact | Scarab Amulet | Beyond the safe floor-symbol route across the spike platforms |
| ☐ | Charm | Armband #3 | Crate on the beach after the zipline and guard fight |
| ☐ | Charm / Theseus Echo | Pierced Coin #1 | Green axe and bowl at the top of the ladder beyond the pond |
| ☐ | Blade | Greek Sword | Large chest in the optional bull-pillar crypt |
| ☐ | Artefact | Ceremonial Blade | Small right-hand tree path on the second optional branch |
| ☐ | Artefact | Condottiero Stamp | End of the staircase on the third optional branch |
Resonance Point Groups
| Done | Group | Amount | Landmark |
|---|---|---|---|
| ☐ | 1 | 1 | Outside the first room |
| ☐ | 2 | 1 | Left of the entrance door after the first puzzle |
| ☐ | 3 | 1 | Right of the stairs after the zipline |
| ☐ | 4 | 1 | House on the right after pulling down the fence |
| ☐ | 5–6 | 2 | Automatic reward after the Trinket camp fight |
| ☐ | 7 | 1 | Straight path after the camp fight |
| ☐ | 8 | 1 | Under the lonely tree above the boats |
| ☐ | 9 | 1 | Ruined house left of the stone stairs |
| ☐ | 10 | 1 | Under the hammer/axe-marked door |
| ☐ | 11 | 1 | First tower on Leni's side after reuniting |
| ☐ | 12–13 | 2 | Automatic reward after the upper enemy fight |
| ☐ | 14–15 | 2 | Square-platform route before the symbol |
| ☐ | 16 | 1 | Left side after the square-platform traps |
| ☐ | 17 | 1 | Small pond on the left path through the three-line symbol |
| ☐ | 18 | 1 | Bird nest on the first optional branch |
| ☐ | 19 | 1 | Beside the green gem in the skull-tower branch |
| ☐ | 20 | 1 | Near the barrel on the return to the bull door |
| ☐ | 21 | 1 | Left side of the room with the central light |
| ☐ | 22 | 1 | Rock at the end of the zipline |
| ☐ | 23–24 | 2 | Rocks on the right after crossing the bridge |
| ☐ | 25 | 1 | Right side after the Grapnel climb |
| ☐ | 26 | 1 | Right side of the following room |
Check the chapter tracker before completing the final memory. If a named item is missing, Chapter Select is safe for cleanup. If the Resonance Point total is short, restart the point sweep from the beginning of Chapter V instead — those points are tied to the current run.