Chapter 6: What Lies Beneath
Last verified: September 2, 2026
Sophia falls beneath the island and has to find a way through its buried machinery while a creature hunts in the dark. This chapter contains 28 collectible locations: 1 Blade, 2 Artefacts, 3 Charms and 22 Resonance Points. The Pierced Coin is the third Charm and the chapter's one Theseus Echo classification, not an extra pickup.
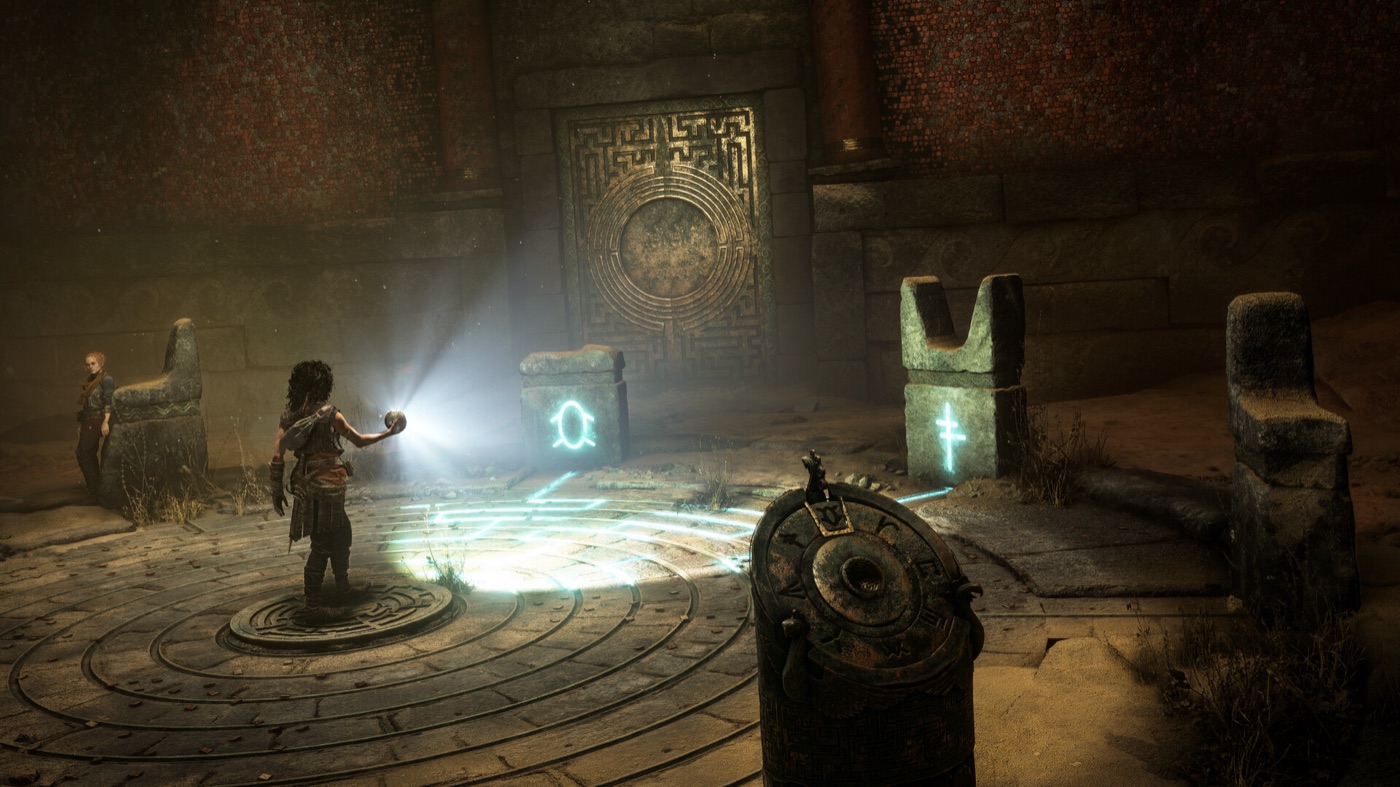
The ruins below the island turn light, cover and careful movement into Sophia's only route forward.
Chapter VI at a Glance
What Lies Beneath is built around one rule: the creature cannot be defeated, so every dark passage is a decision about when to move and when to hide. The five sections are Lost, The Creature, False Hope, Minoan Machinery and The Architect.
| Category | Chapter total | What to look for |
|---|---|---|
| Blade | 1 | Sica, in an optional bull-pillar light puzzle |
| Artefacts | 2 | Minoan Queen and Corrupted Mosaic |
| Charms | 3 | Seal #3, Bead #3 and Pierced Coin #2 |
| Theseus Echoes | 1 classification | Pierced Coin #2, counted within the three Charms above |
| Resonance Points | 22 | Glowing points tucked beside the safe route and inside chase areas |
The 22 Resonance Points are the run-sensitive part of this chapter. They do not carry over through Chapter Select, so collect them in one continuous run and reach checkpoints after sweeping an area. The Blade, Artefacts and Charms can be cleaned up later through chapter replay.
How to Survive the Creature
The creature tracks Sophia's trail and is stopped by active light. You cannot damage it. Use the following rhythm instead of trying to fight:
- Run between lights: when the creature is actively chasing, sprint from one brazier or illuminated safe patch to the next. Stop once you are in the light.
- Move slowly in darkness: walking or crouching leaves less of a trail than sprinting. Save a sprint for the final gap, door or light.
- Watch for the inhale: dust and particles pulling toward the creature signal that it is searching. Get behind rubble or a broken pipe and stay still until the inhale ends.
- Jump during the waterwheel chase: there is no time to hide after Sophia lands on the wheel. Keep moving across the spinning platforms and follow the path into the light.
Run 1 — Find Your Footing
Section: Lost · Objective: Find a way out of the underground cavern.
Sophia wakes below the island after the fall at the end of Chapter V. Follow the trail through the opening tunnel and keep climbing until you reach the cavern with the statue head. Continue toward the doorway on the right and squeeze through the rocks to meet the first major threat.
Resonance Point 1 — Lit patch after the first gap
Follow the long tunnel, climb the slope and jump the first gap. After landing, look to the right in the patch of light. Pick up the point before dropping into the large statue chamber.
After the scene with Olivio, go through the doorway he used. You will find him petrified in the wall. Squeeze through the opening beyond him and step onto the pressure plate in the next cavern. The lamps above the stairs introduce the light rule that carries through the rest of the chapter.
Run 2 — Light to Light
Section: The Creature · Objective: Reach the next exit without being caught.
Drop toward the first illuminated area and wait for the creature to withdraw. Sprint to the next light, then climb the stairs. At the top, the route becomes slower: crouch behind the protruding rock and move from cover to cover only after the inhale ends. Use the Grapnel at the far stairs to cross the gap.
Resonance Point 2 — Right of the next light
After the first light-to-light escape, go upstairs into the darker section with broken tubes. When you reach the next illuminated area, pause before taking the stairs on the left. Check the right-hand path for the point.
Resonance Point 3 — Top of the left rocks
From Point 2, climb the stairs on the left and swing across with the Grapnel. In the following area, climb the rocks on the left before you climb the right side toward the hanging tubes. The point is at the top of those left rocks.
Resonance Point 4 — Long corridor
After crouching through the tunnel where the creature ambushes you, enter the long corridor with a light at the far end. Search beside the first rock on the left in the lit section. In versions where that old spot is empty, sweep the illuminated corner immediately before it; the point has been reported there after an update.
Continue through the broken-pipe passage. When the creature appears at the opposite end, retreat into the light and let it pass. Move slowly through the final dark stretch, then sprint to the lit doorway. Use the Grapnel above the locked door and jump across the platforms; Sophia falls into the next chamber when the mast gives way.
Run 3 — Under the Wheel
Section: False Hope · Objective: Find a way to the surface.
After the fall, follow the route around the broken waterwheel. Stay on the right-hand side of the chamber and climb toward the Grapnel point. Several points sit on the route before the next creature chase, so do not rush past the wheel.
Resonance Point 5 — Beneath the broken wheel
From the start of False Hope, follow the main path to the broken waterwheel. The point is directly beneath it, before the gap and the right-side climb.
Minoan Queen — Artefact
Jump the gap from Point 5, walk beneath the broken wheel and go straight ahead. Climb the ledge on the right into the cave/alcove. Take the Minoan Queen before using the Grapnel to climb out; climbing first moves you past this branch.
Resonance Points 6–7 — Below the Grapnel climb
Use the Grapnel after the Minoan Queen cave, then immediately turn right and drop down the ledge before the next gap. Two points are together in this short side area.
Resonance Point 8 — Below the second light
When the next chase begins, reach the second light source and look over the cliff edge. A point is glimmering below. Pick it up quickly, then return to the safe route.
Resonance Point 9 — Broken tube at the far right
Continue into the following open area and check the far-right edge. The point is inside the broken tube. This is still an active chase, so use the nearest light as your reset point if you need to make a second attempt.
Now follow the right wall into the large waterwheel chamber. When the mast breaks beneath Sophia, sprint across the spinning wheels and jump each gap. The shifting rocks seal the route behind you, leading into Minoan Machinery.
Run 4 — The Lens Room
Section: Minoan Machinery · Objective: Find a way to clear the path.
After the waterwheel escape, use the gaps and lights to cross the next cavern. Keep the points on the edges of the safe route in mind, then reach the lantern-lined room at the end.
Resonance Point 10 — Behind the first rock
After squeezing through the gap into Minoan Machinery, turn left immediately. The point is tucked behind the first rock.
Resonance Point 11 — Next light
Continue a short distance from Point 10. The next point is in the open at the following light source.
Resonance Point 12 — Left side of the lantern room
After another creature escape, enter the room lined with lanterns. Check the left side as you enter for the point.
Seal #3 — Charm behind the right-hand crates
In the same lantern room, go to the end of the hall. Break open the wooden boxes on the right to reveal the chest containing the Seal #3 Charm. The mirror and more boxes are on the opposite side of this space.
Resonance Points 13–14 — Turn right after the mirror
Break the marked box at the end of the hall to reveal the lens/reflector. Aim its light at the corruption blocking the passage. Enter the cleared path and turn right before squeezing through the lit gap. Two points are waiting there.
Lens puzzle: the box at the end of the lantern route contains the reflector. Use it to send light onto the corrupted growth covering the passage. Once the route opens, go through the door and enter the broad chamber with the labyrinth in the distance. Run toward the petrified figure at the edge of the platform to trigger the cutscene that unlocks Daedalus's Key.
Run 5 — Daedalus's Shortcut
Section: The Architect · Objective: Follow Daedalus's shortcut and find a way to the surface.
After the key cutscene, look around the platform for the door between two braziers. Follow the right-hand path and open it with Daedalus's Key. The next collectibles are deliberately split to either side of the staircase, so sweep both sides before taking the doors below.
Corrupted Mosaic — Artefact
After the key cutscene, face the staircase you came from. Take the dark path to the left and look in the doorway ahead for the glimmering Corrupted Mosaic.
Bead #3 — Charm
Return to the same post-cutscene area, face the staircase again and take the dark path to the right. The chest at the end contains Bead #3.
Pierced Coin #2 — Charm and Theseus Echo
From the Bead chest, drop down the cliff. Do not take the door on the right. Go straight to the door at the far end and interact with the axe-shaped offering bowl to collect Pierced Coin #2. This is the chapter's one Theseus Echo classification and is already included in the three-Charm total.
Resonance Points 15–16 — Door beside the offering bowl
From the axe-bowl room, turn right and open the nearby door. Two points are on the floor inside.
Resonance Point 17 — Before the left tunnel
Backtrack to the door you passed before the offering-bowl room and take it this time. Follow the path until you see a tunnel on the left; the point is just before that entrance.
Resonance Point 18 — Bottom of the left tunnel
Take the left tunnel, jump the gap on the left and drop down the ledge. The point is at the bottom of this short descent.
Optional Blade — Sica
In the room after the left-tunnel descent, look for the bull pillar and the surrounding pillars carrying beams of light. Jump onto the first lit platform on the left and use the sphere's beam function. Align the lights as follows:
- Green: the receptor below the bull pillar.
- Blue: the receptor below the pillar where Sophia is standing.
- Red: the rear-right pillar, where the beam reflects into the mirror.
When the alignment is correct, the axe-marked floor opens. Go down into the tomb and open the large chest for the Sica, the chapter's Blade.
Resonance Point 19 — Left of the Sica chest
After opening the tomb chest, check the floor to the left of it for the next point before leaving the room.
Resonance Points 20–21 — Left side of the uphill escape
When the creature starts chasing again, drop down through the pipes into the dark area. Climb uphill on the left side to find two points at the top. Move decisively, because the creature is active in this section.
Resonance Point 22 — Left after the final Grapnel swing
From the two points on the hill, use the Grapnel to swing to the right. Go uphill, squeeze through the gap and check left immediately. This is the final Resonance Point in Chapter VI.
For the final escape, use the key on the next door and enter the pipe area. Move slowly through the first dark stretch, then sprint across the pipes when the creature gives chase. Reach the brazier, use the rocks and broken pipes as cover, and make the final run through the crack in the wall.
Complete Collectible Checklist
Use this compact checklist to confirm the entire chapter. There are 28 physical locations: six named items plus 22 Resonance Points. The Pierced Coin is listed under Charms and Theseus Echoes because it fulfils both classifications at the same altar.
| Done | Item | Section | Landmark |
|---|---|---|---|
| ☐ | Resonance Point 1 | Lost | Right side of the first lit patch after the gap |
| ☐ | Resonance Point 2 | The Creature | Right path beside the next light, before the left stairs |
| ☐ | Resonance Point 3 | The Creature | Top of the left rocks after the Grapnel swing |
| ☐ | Resonance Point 4 | The Creature | Long corridor, beside the first left rock; sweep the preceding lit corner if absent |
| ☐ | Resonance Point 5 | False Hope | Under the broken waterwheel |
| ☐ | Minoan Queen | False Hope | Right-side cave/alcove beneath the wheel, before the Grapnel climb |
| ☐ | Resonance Points 6–7 | False Hope | Right drop immediately after the Grapnel climb |
| ☐ | Resonance Point 8 | False Hope | Below the cliff at the second light during the chase |
| ☐ | Resonance Point 9 | False Hope | Inside the broken tube at the far-right edge |
| ☐ | Resonance Point 10 | Minoan Machinery | Behind the first rock after the gap |
| ☐ | Resonance Point 11 | Minoan Machinery | At the next light |
| ☐ | Resonance Point 12 | Minoan Machinery | Left side of the lantern room |
| ☐ | Seal #3 | Minoan Machinery | Chest behind the right-hand wooden crates |
| ☐ | Resonance Points 13–14 | Minoan Machinery | Right turn after using the lens, before the lit gap |
| ☐ | Corrupted Mosaic | The Architect | Dark path left of the staircase after the key cutscene |
| ☐ | Bead #3 | The Architect | Dark path right of the staircase after the key cutscene |
| ☐ | Pierced Coin #2 | The Architect | Axe-shaped offering bowl beyond the far door |
| ☐ | Resonance Points 15–16 | The Architect | Door beside the offering-bowl room |
| ☐ | Resonance Point 17 | The Architect | Path before the left-side tunnel |
| ☐ | Resonance Point 18 | The Architect | Bottom of the left tunnel after the gap |
| ☐ | Sica | The Architect | Optional bull-pillar puzzle, inside the opened tomb |
| ☐ | Resonance Point 19 | The Architect | Left of the Sica chest |
| ☐ | Resonance Points 20–21 | The Architect | Top of the left side of the uphill escape |
| ☐ | Resonance Point 22 | The Architect | Left immediately after the final Grapnel gap |
Check the total in the chapter tracker before making the final run. If the named items are complete but the Resonance Point count is short, replaying Chapter VI will not add those points to the old run; start the point sweep again from Point 1 and carry it through to the next checkpoints.
What Comes Next?
Chapter VI ends once Sophia escapes the pipe network. Continue with the complete walkthrough for the next chapter, or use the collectibles guide to compare your chapter totals across the whole island.