Chapter 4: From Hell It Rose
Last verified: September 1, 2026
From Hell It Rose sends Sophia and Leni into the first Trial, the island's deadly gauntlet of light puzzles and ambushes. Across its five sub-chapters it holds 23 collectible locations — 1 Blade, 3 Artefacts, 2 Charms and 17 Resonance Points.
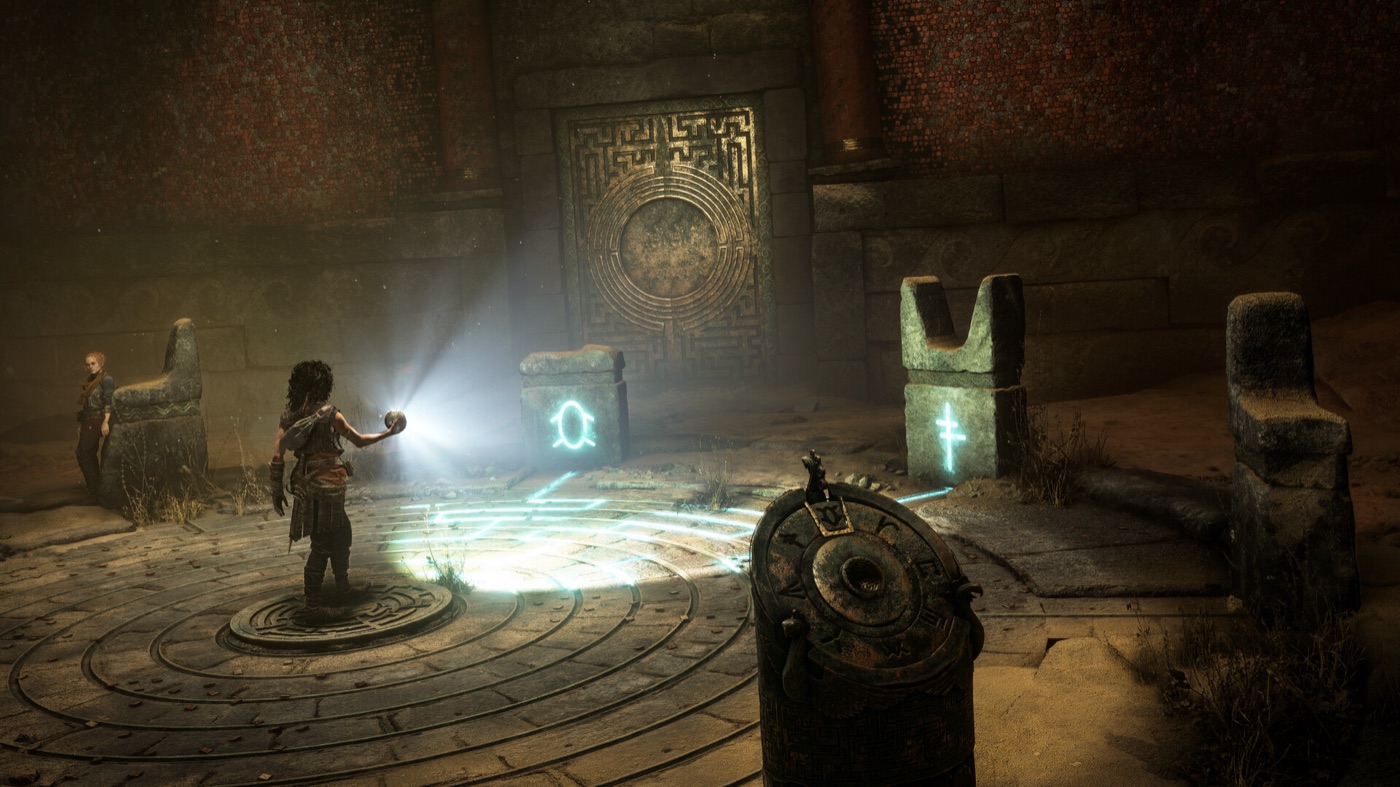
Chapter IV opens the Trial — a descent into the island's oldest ruins, where light is the only way forward.
Chapter 4 Overview
Chapter IV: From Hell It Rose is divided into five sub-chapters:
- Sub-Chapter 1 — A familiar threat
- Sub-Chapter 2 — Down the abyss
- Sub-Chapter 3 — Puzzles and Traps
- Sub-Chapter 4 — At the bottom
- Sub-Chapter 5 — Theseus
The Trial is the game's first real gauntlet: it introduces the pedestal-symbol puzzles, the light reflectors, the spike-trap corridors and the great bull mirror room, and it is where Sophia unlocks the Light Reveal sphere upgrade at the Trial's Entrance. You also gain the Focus ability during a flashback fight in Theseus' memory.
The collectible route starts immediately — the first Resonance Point is behind the statue at the very beginning of the chapter — and it never lets up until the mirror room. Six named items make up the rest of the set: the Arm Band #2 and Trinket #1 Charms, the Polished Cornicello, Horned Rhyton and Grand Mosaic Artefacts, and the Kopis, the first blade drawn from a Hero's Grave.
All 17 Resonance Points in this chapter must be collected in your current run. They do not carry over in Chapter Select, and they only save when you reach the next checkpoint. The "Like a warrior" trophy needs 165 of the game's 200 Resonance Points in a single playthrough, so treat every point here as missable. See the collectibles guide for the full breakdown.
Sub-Chapter 1 — A familiar threat
Objective: Reach the Trial's Entrance.
Resonance Point — Behind the statue
From the start of the chapter, turn around and look at the stairs beneath the nearest statue. The first Resonance Point of the chapter is sitting right there, before you take a single step forward.
2 Resonance Points — Automatic combat reward
After swinging across to the bridge, defeat the first group of enemies to earn 2 Resonance Points automatically. Combat rewards like this one are granted the moment the encounter ends.
Resonance Point — Corner of the pedestal room
Defeat the enemies and enter the building ahead. When you stand in front of the pedestal you have to use, turn right — the point is in the corner of the room.
Puzzle pointer — 3 Symbols: use the sphere to shine light at the three pedestals, then follow the blue lines on the floor to the symbols on the walls. Rotate each pedestal to the symbol it is linked to. Solution (left to right): Y-C-↑. Full walkthrough in the puzzle solutions guide.
Sub-Chapter 2 — Down the abyss
Objective: Progress through the Trial.
Arm Band #2 — Charm
After the pedestal puzzle you reach an open area with a big statue. Before dropping down the ledge, climb up the first rock on the right. This leads to a hidden camp with a small chest containing the Arm Band #2.
Resonance Point — Hidden camp
Still in the hidden camp, check the right corner — a Resonance Point sits next to the chest.
Polished Cornicello — Artefact (Relic of the Present)
Climb back down the rock, drop down the next ledge and immediately turn around. Climb down the ladder to collect the Polished Cornicello.
Resonance Point — Puzzle room, upper left
Continue on the story path until you crawl through a hole into the next room. The point is on the upper left side of this puzzle room.
Puzzle pointer — Reflector: above the door you entered from is a floor plate. Go upstairs and stand on it to make a light appear, then chain it through the reflectors — left, right, front left, front right — until it hits the symbol on the door. Full solution in the puzzle guide.
Puzzle pointer — Maze: shine the sphere at the floor and follow the blue lines from the pedestals to their linked symbols. The left disk matches the O-shaped symbol and the right disk matches the F-like mark. Full solution in the puzzle guide.
2 Resonance Points — Automatic combat reward
Defeat the next group of enemies after the maze puzzle to earn 2 Resonance Points automatically.
Resonance Point — Dead end before the wall
After Leni saves you from a hallucination, she will squeeze through a wall. Before following her through, take the path to the dead end instead — the point is waiting there.
Resonance Point — Left of the gap
Squeeze through the wall now, then turn left and jump over the gap to grab the next point.
Resonance Point — Before the big door
Jump back over the gap and follow the path to its end. The point is on the left side — grab it before interacting with the big door.
Sub-Chapter 3 — Puzzles and Traps
Objective: Progress through the Trial.
Puzzle pointer — Spike Traps: shine the sphere to reveal the symbols on the walls that mark which floor plates are safe. For the corridor with the wall spikes, six switches line the wall — use Light Reveal to spot the marked one and press it. Full solution in the puzzle guide.
Horned Rhyton — Artefact (Relic of the Past)
After passing the traps you reach another puzzle room. Immediately turn left and go around the corner to find the Horned Rhyton.
Resonance Point — Upstairs, right corner
After the puzzle, go upstairs and immediately turn the right corner to pick up the point.
Kopis — Blade (Heroes' Graves #1)
Interact with the pedestal to open the tomb, then go down and open the big chest inside. The Kopis is directly on the story path — basically unmissable. It is the first of the eight blades taken from Heroes' Graves, and it counts toward the "Plunderer" and "Adaptable" trophies; see the trophy guide for those requirements.
Sub-Chapter 4 — At the bottom
Objective: Progress through the Trial.
Grand Mosaic — Artefact (Relic of the Past)
After sliding down the long zipline, immediately turn left and jump over the gap — the opposite direction from the story path. The Grand Mosaic is over there.
2 Resonance Points — Automatic combat reward
In the room where you pull the big lever you are ambushed by archers. Win the fight to earn 2 Resonance Points automatically.
For the "Returning the Favor" trophy, keep an eye on the floor in that lever room: there is a knife sticking out of the ground in front of the lever. Pick it up and throw it at one of the archers during the ambush — a throwing-knife kill on an archer unlocks the trophy (Bronze). It is the earliest reliable spot for it in the game.
Trinket #1 — Charm
Squeeze through the gap into the next room and drop down. There is a chest under the ledge where you land — inside is the Trinket #1.
Sub-Chapter 5 — Theseus
Objective: Progress through the Trial.
Puzzle pointer — Bull Mirror: in the arena, check the ground between the mirrors — white symbols on a red background, some with a blue outline linking them in pairs. Shine the mirrors at both blue-linked icons on the walls simultaneously, pair by pair. Once the bull lowers its hands, use the sphere on the rings to reveal two more symbols and repeat. Full solution in the puzzle guide.
3 Resonance Points — Automatic combat reward
After the mirror puzzle, survive the enemy encounter in the arena to earn 3 Resonance Points automatically — the chapter's final collectibles.
All Chapter 4 Collectibles
| # | Type | Name | Location |
|---|---|---|---|
| 1 | Artefact (Relic of the Present) | Polished Cornicello | Sub-Chapter 2, down the ladder after dropping off the ledge by the hidden camp |
| 2 | Artefact (Relic of the Past) | Horned Rhyton | Sub-Chapter 3, immediately left around the corner in the puzzle room after the traps |
| 3 | Artefact (Relic of the Past) | Grand Mosaic | Sub-Chapter 4, jump the gap to the left after the long zipline (off the story path) |
| 4 | Charm | Arm Band #2 | Sub-Chapter 2, small chest in the hidden camp above the first rock |
| 5 | Charm | Trinket #1 | Sub-Chapter 4, chest under the ledge after squeezing through the gap |
| 6 | Blade | Kopis (Heroes' Graves #1) | Sub-Chapter 3, big chest in the tomb opened by the pedestal — on the story path |
| 7 | Resonance Point | — | Sub-Chapter 1, on the stairs beneath the statue at the chapter start (turn around) |
| 8 | Resonance Point | — | Sub-Chapter 1, automatic combat reward after the first group of enemies |
| 9 | Resonance Point | — | Sub-Chapter 1, automatic combat reward after the first group of enemies |
| 10 | Resonance Point | — | Sub-Chapter 1, right corner of the room in front of the pedestal |
| 11 | Resonance Point | — | Sub-Chapter 2, right corner of the hidden camp |
| 12 | Resonance Point | — | Sub-Chapter 2, upper left side of the puzzle room after crawling through the hole |
| 13 | Resonance Point | — | Sub-Chapter 2, automatic combat reward after the maze puzzle |
| 14 | Resonance Point | — | Sub-Chapter 2, automatic combat reward after the maze puzzle |
| 15 | Resonance Point | — | Sub-Chapter 2, dead end path before squeezing through the wall after Leni's hallucination |
| 16 | Resonance Point | — | Sub-Chapter 2, after squeezing through the wall — turn left and jump over the gap |
| 17 | Resonance Point | — | Sub-Chapter 2, left side at the end of the path, before the big door |
| 18 | Resonance Point | — | Sub-Chapter 3, immediately around the right corner after going upstairs |
| 19 | Resonance Point | — | Sub-Chapter 4, automatic combat reward after the lever room ambush |
| 20 | Resonance Point | — | Sub-Chapter 4, automatic combat reward after the lever room ambush |
| 21 | Resonance Point | — | Sub-Chapter 5, automatic combat reward after the arena encounter |
| 22 | Resonance Point | — | Sub-Chapter 5, automatic combat reward after the arena encounter |
| 23 | Resonance Point | — | Sub-Chapter 5, automatic combat reward after the arena encounter |
That accounts for all 23 collectible locations in Chapter IV: From Hell It Rose. The three Artefacts count toward the 37 needed for the "Hoarder" trophy, the two Charms toward the 30 needed for "Superstitious", and the Kopis toward the eight blades required for "Plunderer" and "Adaptable". The 17 Resonance Points only count toward "Like a warrior" if you collect them in the same playthrough — see the collectibles guide for the missable warning in full.